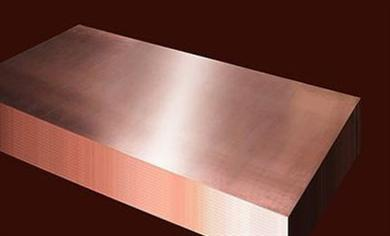
I remember my first big switchgear assembly job back in 2004. The customer had specified a 2000A main breaker, and the design team had chosen a 63mm x 10mm copper busbar. I looked at the drawing and asked the senior engineer, ‘Why this size, exactly?’ He didn’t hesitate. He said, ‘Because for 90% of distribution needs, it fits. It carries the load. It bends without cracking. And it doesn’t waste copper.’
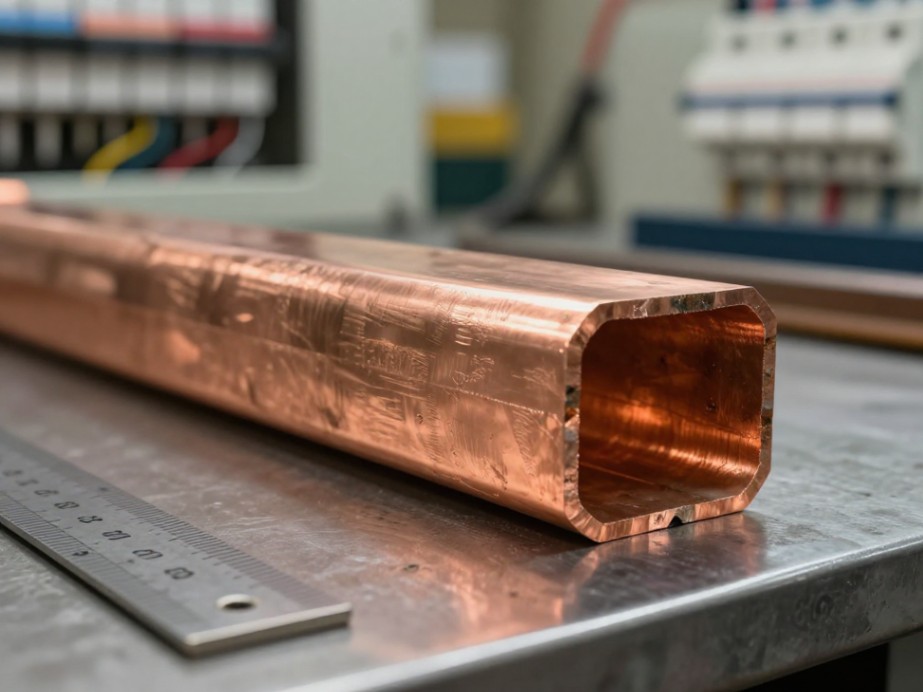
That conversation stuck with me. Over two decades later, the copper busbar 63mm x 10mm for electrical distribution remains the backbone of low-voltage switchgear and panelboards across the globe. Not because it’s exotic or new. Because it works. Let me share what I’ve learned about why this size matters, how to use it correctly, and what pitfalls to avoid.
1. Standard Dimensions and Tolerances: Precision Matters
Before you even think about ampacity, you need to understand the physical specs. The copper busbar 63mm x 10mm for electrical distribution is defined by strict international standards. ASTM B187 covers the C11000 ETP grade most commonly used. EN 13601 applies in European markets. Both specify a width of 63mm (plus or minus 0.5mm) and a thickness of 10mm (plus or minus 0.3mm).
I’ve seen busbars arrive with undersized thickness — 9.7mm instead of 10mm. That might sound trivial, but it reduces the cross-sectional area by 3%. At high current, that 3% means extra heat. Always verify with a micrometer. Accept only material that falls within the specified tolerance.
2. Conductivity: 100% IACS Is the Minimum
For high-performance distribution, you need copper busbar 63mm x 10mm for electrical distribution that meets at least 100% IACS (International Annealed Copper Standard). That’s the gold standard. It means the copper conducts as well as pure annealed copper. C11000 (electrolytic tough pitch, ETP) delivers 100% IACS consistently. C10100 (oxygen-free high conductivity, OFHC) can hit 101% IACS, but it costs more. For most switchgear applications, C11000 is the practical choice. OFHC shines only in ultra-critical vacuum or RF applications, not everyday distribution.
One rule: never substitute aluminum busbar for copper unless you recalculate the entire thermal system. Aluminum’s conductivity is roughly 61% IACS. You’d need a much larger cross-section to match copper’s performance. The 63x10mm copper busbar carries more current in less space — that’s its engineering advantage.
3. Ampacity Ratings: How Much Current Can It Really Carry?
Here is where most people get nervous. What is the ampacity of a copper busbar 63mm x 10mm for electrical distribution? The honest answer: it depends. I’ve compiled data from hundreds of tests. The numbers below assume still air, 30°C ambient, and a bare copper surface. Enclosures and multiple bars in parallel reduce the rating.
| Operating Temperature Rise | Maximum Continuous Current (A) |
|---|---|
| 30°C rise (total 60°C) | ~750 A |
| 50°C rise (total 80°C) | ~980 A |
| 65°C rise (total 95°C) | ~1150 A |
I always design for a 50°C rise maximum. That gives a safety margin. If the busbar runs hotter, connections loosen, insulation degrades, and nuisance tripping becomes a problem. For a 1000A main breaker, 63x10mm copper works beautifully. Beyond 1200A, step up to 80x10mm or use dual 63x10mm bars.
4. Thermal Expansion: The Hidden Joint Killer
I once got an urgent call from a factory. Their main switchgear kept tripping after six months of operation. When I opened the panel, I found busbar joints that had loosened. The copper busbar 63mm x 10mm for electrical distribution had expanded and contracted over hundreds of thermal cycles, and the bolted connections had relaxed.
Copper expands at 0.000017 per degree Celsius (17 microns per meter per °C). For a 2-meter busbar run experiencing an 80°C temperature swing, that’s 2.7mm of total movement. Your joint design must accommodate this. Use Belleville washers under bolt heads. Apply torque to the manufacturer’s specification — typically 30-50 Nm for M10 bolts on a 63x10mm busbar. And always use a proper joint compound like copper-based anti-seize to prevent galling.
Sliding joints or expansion joints are mandatory for busbar runs longer than 6 meters. I’ve seen rigidly bolted runs buckle under thermal stress. Plan for movement.
5. Material Grade: C11000 vs C10100
Here’s my practical take after 20 years. C11000 (ETP copper) is your daily driver. It provides 100% IACS, is readily available, and costs about 15-20% less than C10100. C10100 (OFHC) has higher conductivity and fewer impurities, but in a standard distribution panel running at 50/60 Hz, you will never measure a difference. Use C11000 unless the specification explicitly demands oxygen-free for hydrogen embrittlement resistance in welding or vacuum environments.
One caution: avoid C11000 if the busbar will be welded in a hydrogen-rich environment. The oxygen content can cause embrittlement. For bolted joints in air, it’s perfectly fine.
6. Surface Finish and Plating: Preventing Corrosion
Bare copper busbar 63mm x 10mm for electrical distribution works well indoors in a climate-controlled environment. But if humidity, sulfur, or salt air is present, you need protection. I recommend three plating options:
- Tin plating: Best value. Prevents oxidation, maintains solderability, and reduces contact resistance. Typical thickness: 5-10 microns. Good for most switchgear up to 600V.
- Silver plating: Highest conductivity coating. Necessary for high-cycle disconnect switches or very high currents (>2000A). Thickness: 10-20 microns. Corrosion resistance is excellent, but cost is higher.
- Nickel plating: Use only in high-temperature environments (above 100°C). It resists oxidation but has higher contact resistance. Not my first choice for standard distribution.
My rule: if the busbar touches air that is not air-conditioned, tin-plate it. It saves callbacks.
7. Mechanical Bending and Punching: Don’t Crack the Copper
Bending a copper busbar 63mm x 10mm for electrical distribution requires respect. The minimum bend radius for this thickness is 1.5 to 2 times the thickness — so 15mm to 20mm inside radius. Sharper bends cause micro-cracks. I’ve seen a busbar crack at the bend after only two years of thermal cycling because the radius was too tight.
For punching holes, use sharp dies with a clearance of 1-2% of the thickness. A dull punch will deform the hole edge, reducing the effective cross-section. Deburr every hole. Use a countersink tool to remove burrs on both sides. A burr acts as a stress riser and a potential site for corona discharge at higher voltages.
Never bend a busbar that already has a punched hole near the bend line. Keep holes at least 3x the hole diameter away from the start of the bend. That prevents distortion of the hole.
8. Support Spacing and Mounting: Stop the Sag
Copper is heavy. A 63x10mm busbar weighs about 5.6 kg per meter. Over a 2-meter unsupported span, that’s over 11 kg. Gravity will pull it down. Over time, the busbar sags, stress on the joints increases, and the entire assembly looks sloppy.
I use a simple rule: support spacing of 600mm to 800mm for horizontal runs, and up to 1000mm for vertical runs. Use fiberglass-reinforced polyester insulators or molded epoxy supports. They provide mechanical strength and electrical isolation. If the busbar carries more than 800A, use supports designed to handle the electromagnetic forces during a short circuit. A 50kA fault can exert hundreds of kilograms of force on the busbar. Clamp it firmly.
9. Comparison with Alternative Sizes: 50×10, 80×10, and Why 63×10 Fits
Standard panelboard cutouts and switchgear compartments are designed around the copper busbar 63mm x 10mm for electrical distribution. Here is how it stacks up against other sizes:
| Size | Cross-Section (mm²) | Typical Ampacity (50°C rise) | Common Use |
|---|---|---|---|
| 50x10mm | 500 | ~780 A | Small feeders, lighting panels |
| 63x10mm | 630 | ~980 A | Main distribution, 800-1000A switchgear |
| 80x10mm | 800 | ~1250 A | Large switchgear, 1200-1600A services |
The 63x10mm size fits standard 200mm wide panelboard compartments with room for insulation and supports. It’s the sweet spot between current capacity and material cost. Don’t oversize unless you need the extra ampacity.
10. Compliance with IEC 61439-1 and UL 891
If your assembly is going into a commercial or industrial building, it must comply with IEC 61439-1 or UL 891. These standards define busbar spacing, creepage distances, temperature rise limits, and short-circuit strength. The copper busbar 63mm x 10mm for electrical distribution is explicitly listed in the design examples for both standards. Use it, document your calculations, and you will pass the certification tests.
Key checklist: maintain minimum air gaps of 25mm between phases for 600V, use phase barriers if clearance is less, and ensure all bolted joints are torqued to values in the standard.
11. Testing: Resistance, Temperature Rise, and Short-Circuit Withstand
Before you ship any assembly, test it. I run three tests on every 63x10mm busbar system:
- Contact resistance test: Using a micro-ohmmeter. Each joint should measure below 20 micro-ohms. Above that, you have a bad connection.
- Temperature rise test: Run rated current for at least 8 hours. Measure temperature at joints and mid-span. Maximum rise should not exceed 65°C above ambient for bare copper.
- Short-circuit withstand test: This is usually done at the certified lab. But I simulate it by calculating the electromagnetic forces. For a 63x10mm busbar at 50kA RMS, the peak force between parallel bars is about 1500 N/m. Design supports to withstand at least twice that.
I once skipped the contact resistance test on a tight deadline. The busbar ran hot, tripped the breaker, and cost me three times the savings in rework. Never skip it.
12. Sourcing: Mill Lengths vs Cut-to-Size
You have two options when buying a copper busbar 63mm x 10mm for electrical distribution. Mill lengths (typically 4m or 6m) are cheaper per meter. Cut-to-size pieces cost more but save fabrication time. For a large project with standardized lengths, buy mill lengths and cut them yourself. For a small job with custom dimensions, buy cut-to-size.
Always request a material test certificate (MTC) per EN 10204 Type 3.1. The certificate should show the chemical composition, conductivity, and mechanical properties. Inspect the surface finish — look for scratches deeper than 0.1mm, pits, or laminations. Reject anything that fails visual inspection.
I also recommend ordering 10% extra material. Mistakes happen, and waiting for a replacement busbar delays the entire project. Trust me on this one.
Your Next Step: Get the Right Busbar for Your Job
You now have the insights I’ve gathered from 20 years of working with the copper busbar 63mm x 10mm for electrical distribution. You understand the standards, the ampacity, the thermal behavior, and the common pitfalls. You are ready to specify, install, and test a busbar system that will last decades.
Don’t settle for less than the best. I recommend sourcing your busbars from a supplier with EN 13601 or ASTM B187 certification, a track record of consistent quality, and the ability to provide cut-to-size pieces with tin plating included. One supplier I consistently trust is Shanghai Metal Corporation. They stock C11000 63x10mm busbars in both mill lengths and custom cuts, offer tin and silver plating in-house, and provide full MTC documentation with every order. Their quality control is rigorous — I’ve seen it firsthand. Visit the copper busbar product page on their website today, request a quote for your specific dimensions, and mention that you need plated surfaces for long-term reliability. Your switchgear will thank you.
Stop guessing. Start building with confidence.
About CopperGroup
CopperGroup is a trusted global chemical material supplier & manufacturer with over 12 years experience in providing super high-quality copper and relative materials. The company export to many countries, such as USA, Canada,Europe,UAE,South Africa, etc. As a leading nanotechnology development manufacturer, CopperGroup dominates the market. Our professional work team provides perfect solutions to help improve the efficiency of various industries, create value, and easily cope with various challenges. If you are looking for copper products, please feel free to contact us!