That pesky little leak under your sink? The one that mocks you with a slow, steady *drip… drip… drip*? Chances are, the culprit is a worn-out ferrule. Don’t let the fancy name scare you. Replacing a ferrule on a copper pipe is a solid DIY win. Let’s get your pipes dry again.
(How To Replace Ferrule On Copper Pipe)
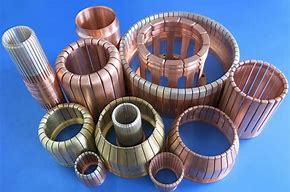
First, understand the enemy. The ferrule, also called an olive, is that small brass ring. It sits inside the compression nut on your shut-off valve or fitting. When you tighten the nut, the ferrule squishes down. It creates a watertight seal against the copper pipe. Time and water pressure wear it out. The seal fails. Leaks happen. Annoying.
Gather your tools. You need an adjustable wrench. Get a pair if you can. You also need a tubing cutter. A small hacksaw works too, but a cutter gives a cleaner end. Grab some fine-grit sandpaper or emery cloth. Have your new ferrule ready. Make sure it matches the old one’s size. Have a new compression nut handy too. The old one might be damaged. Grab a bucket or towel for water drips.
Turn off the water. This is non-negotiable. Find the main shut-off valve for your house. Turn it clockwise until tight. Open the lowest faucet in your house. Let the water drain out. Open the faucet near your repair area. This releases pressure. Water should stop flowing. Confirm it’s off.
Disconnect the leaking fitting. Place your bucket underneath. Use one wrench to hold the valve body steady. Don’t twist the pipe. Use the other wrench on the compression nut. Turn the nut counter-clockwise. Loosen it completely. Pull the pipe free from the valve. Water might drip out. That’s okay.
Remove the old ferrule. Slide the old compression nut off the pipe. You’ll see the old ferrule stuck on the copper. This little guy can be stubborn. Grab it with pliers if needed. Twist it gently. Pull it straight off. Don’t scratch the copper pipe. Inspect the pipe end. Look for deep grooves or damage. If the pipe is badly damaged, you might need to cut a section out. We’ll assume it’s salvageable.
Prepare the pipe end. Use your tubing cutter. Place it squarely around the copper pipe. Tighten the cutter slightly. Rotate it around the pipe. Tighten it a little more each full rotation. Keep going until the pipe cuts cleanly. You want a smooth, square cut. Remove any burrs inside and outside the cut end with your sandpaper. Shine it up nice. A clean, smooth surface is key for the new ferrule seal.
Install the new ferrule. Slide the new compression nut onto the pipe first. The threads should face the valve end. Then slide the new ferrule onto the pipe. Push it down about half an inch from the end. Make sure it sits straight.
Reconnect everything. Insert the cleaned pipe end firmly into the valve fitting. Push it in as far as it will go. Hand-tighten the compression nut onto the valve threads. Now, get your wrenches. Hold the valve body steady with one wrench. Use the other wrench on the nut. Tighten it clockwise. Give it a good firm turn – about a quarter to a half turn past hand-tight. Don’t go crazy. Over-tightening can crush the ferrule or crack the valve. Snug is good.
(How To Replace Ferrule On Copper Pipe)
Test your work. Close the drain faucets you opened earlier. Slowly turn the main water supply back on. Listen. Watch the connection like a hawk. Look for any sign of water. A tiny weep might stop after a minute. A steady drip means trouble. If it leaks, try tightening the nut just a tiny bit more. Still leaking? You might need to re-cut the pipe and try again with fresh parts. No leaks? Victory! You conquered the ferrule. Enjoy your dry floor.
Inquiry us
if you want to want to know more, please feel free to contact us. (nanotrun@yahoo.com)

