**Copper Pipe Cleanup: Your Hands-On Guide to Smooth Edges**
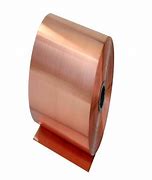
(How To Deburr Copper Pipe By Hand)
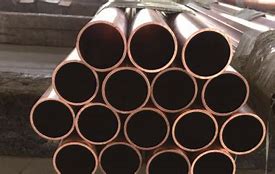
Copper pipes are tough, but their rough edges can turn a simple plumbing job into a finger-slicing nightmare. Burrs—those jagged metal bits left after cutting—are sneaky troublemakers. They mess with water flow, weaken connections, and even scratch your tools. Want to fix them without fancy machines? Grab your gloves. Let’s turn those dangerous edges into silky-smooth perfection.
**What You’ll Need**
A deburring tool (the star of the show), sandpaper (medium grit works), a small file (flat or half-round), safety gloves (trust me, wear them), and a clean rag. Got everything? Time to get busy.
**Step 1: Spot the Enemy**
After cutting a pipe, look closely. See those sharp ridges around the inner and outer edges? Those are burrs. Run your finger lightly—carefully!—around the cut end. If it feels like a tiny shark’s mouth, you’ve got work to do.
**Step 2: Outer Edge Attack**
Grab the deburring tool. It looks like a metal handle with a hooked blade. Press the tool’s blade against the pipe’s outer edge. Twist it clockwise around the pipe. Keep the pressure even. After two or three spins, check your progress. The goal is a smooth, rounded edge—not a deep groove. Overdo it, and you’ll thin the pipe. Slow and steady wins here.
**Step 3: Inner Edge Ambush**
Burrs love hiding inside the pipe. Flip your deburring tool. Most have a cone-shaped tip for this exact job. Push the cone into the pipe’s opening and twist. Again, go clockwise. You’ll feel resistance as the tool shaves off inner burrs. Do a couple of twists, then wipe the pipe with your rag to clear metal shreds.
**Step 4: Sandpaper Sweep**
Even after deburring, tiny ridges might linger. Fold sandpaper into a tight strip. Rub it around the outer edge in quick back-and-forth motions. For the inner edge, wrap sandpaper around a pencil tip and spin it inside the pipe. This polishes everything to a safe, clean finish.
**Step 5: File Check**
Not all burrs surrender easily. Stubborn ones need a file. Hold the pipe steady. Drag the file across the edge in one direction—no sawing motions. Check often. Stop once the edge feels smooth under your glove.
**Pro Tips**
Always deburr before soldering. Burrs trap flux and solder, creating weak spots. Test your work by sliding a finger around the edges. If nothing catches, you’re golden. For pipes carrying drinking water, rinse them after deburring. Metal bits aren’t tasty.
**Mistakes to Dodge**
Skipping gloves? Bad idea. Burrs bite. Rushing the process? You’ll gouge the pipe. Forgetting inner edges? That’s like mopping the floor but ignoring the spilled juice under the fridge.
**Why Bother?**
Smooth pipes mean better water pressure, leak-free joints, and no surprise cuts. It takes five minutes but saves hours of fixing mistakes later. Plus, your plumbing tools will thank you.
(How To Deburr Copper Pipe By Hand)
Deburring isn’t rocket science. It’s about patience and the right moves. Next time you slice into a copper pipe, remember: a little cleanup turns chaos into calm. Your pipes—and your fingers—will stay happy.
Inquiry us
if you want to want to know more, please feel free to contact us. (nanotrun@yahoo.com)

